
Have Visual Studio Code look like the familiar PowerShell ISE
You may ask, why would I give up PowerShell ISE which I’m used to, just to have to learn a new tool?
First, there is no longer any active development of PowerShell ISE. It still works great (most of the time) but if you want to use a tool which is actively being updated and is a modern. Visual Studio Code could be the tool for you. The main reason I like it, is because it supports a lot of different scripting languages and can be integrated with Git to have proper version control.
Let’s start with downloading Visual Studio Code | https://code.visualstudio.com/Download
After you have installed VS Code it’s time to configure it. We’ll add a few extensions; PowerShell, GitHub, Git. Lastly, connect to a GitHub repository.
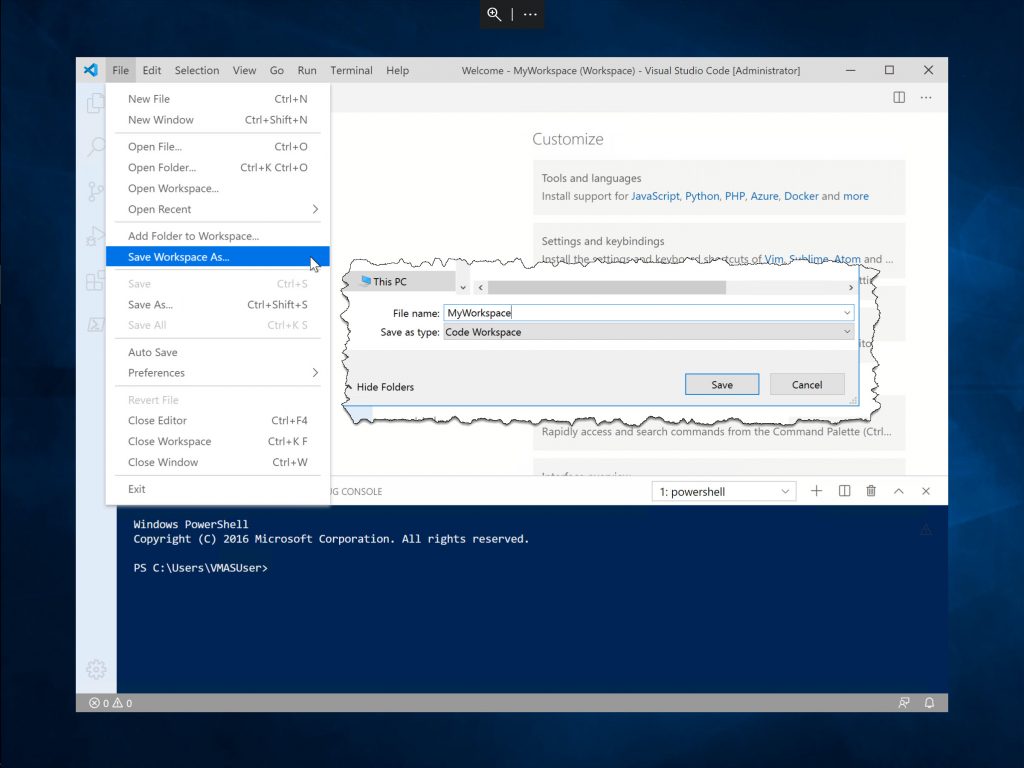
VS Code is now installed, and we have added PowerShell. It’s time to configure it so when we open a new file it will automatically make it a PowerShell file and not that you must specify that every single time. Let’s start off by creating your own ‘Workspace’ so can save the changes to that.
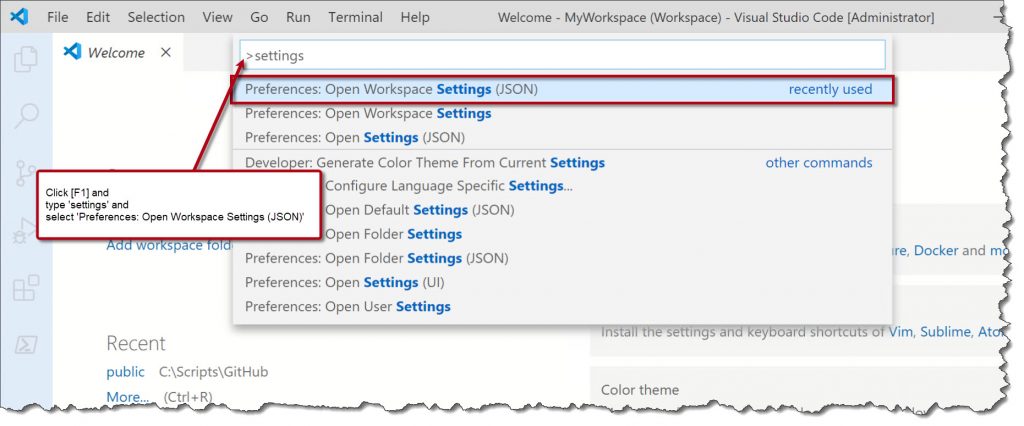
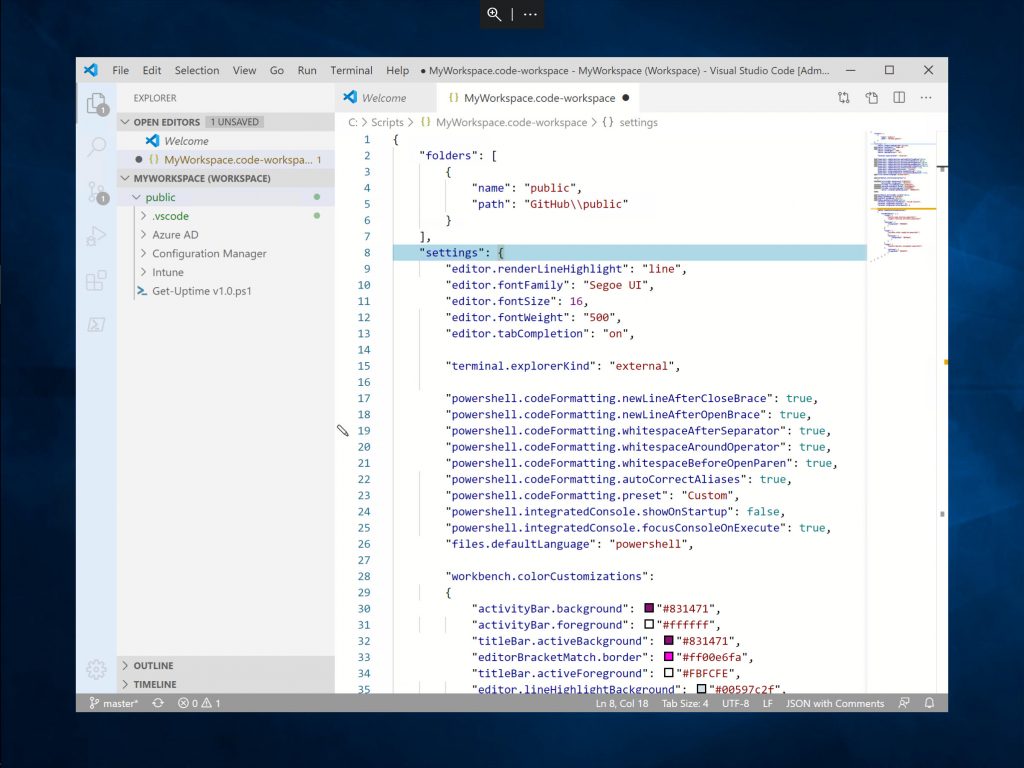
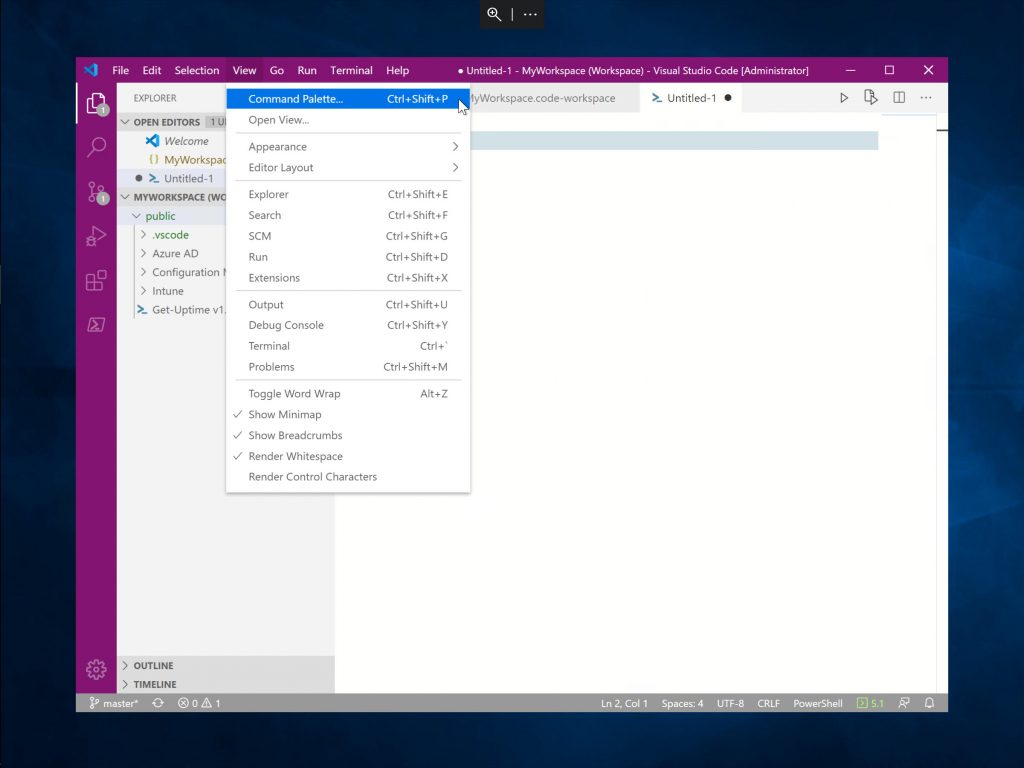
Then… [F1], type ‘settings’ and select ‘Preferences: Open Workspace Settings (JSON)’
That should get you to this view:
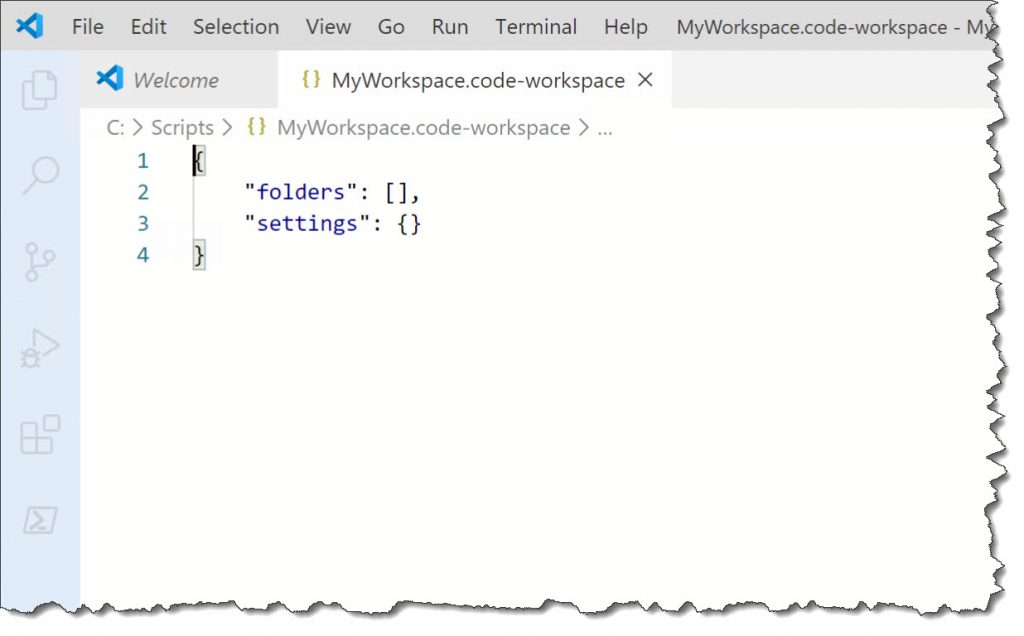
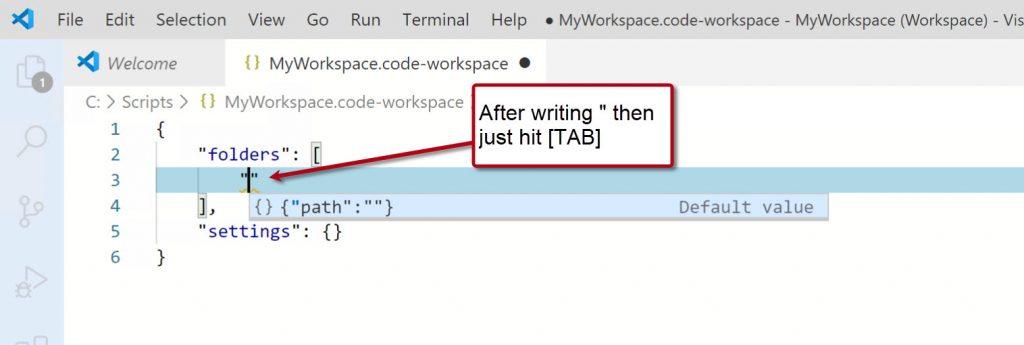
Now, you’ll have a couple of options (probably more) to add your folders/repositories under the “folder” section. Either to start typing ” and add the path to your folder(s). or you click on the ‘two documents’ in the left column (light blue area)…
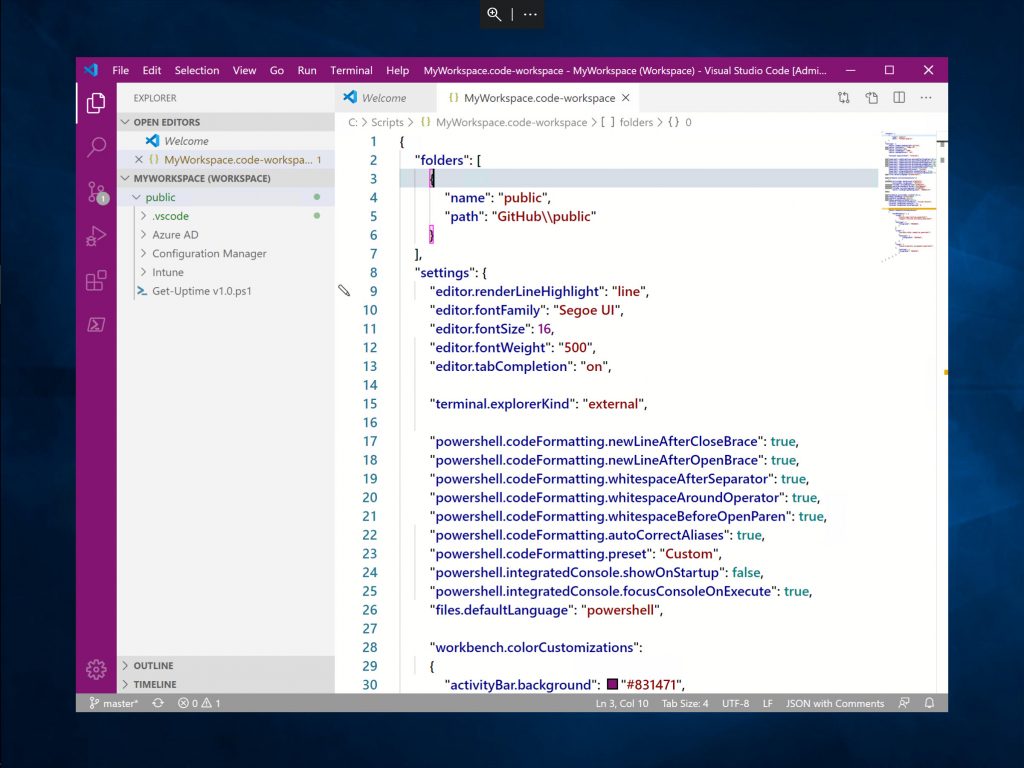
Click on ‘Add Folder’ and/or ‘Clone Repository’ and type/paste the path in the address field. That should also get you the same result 🙂
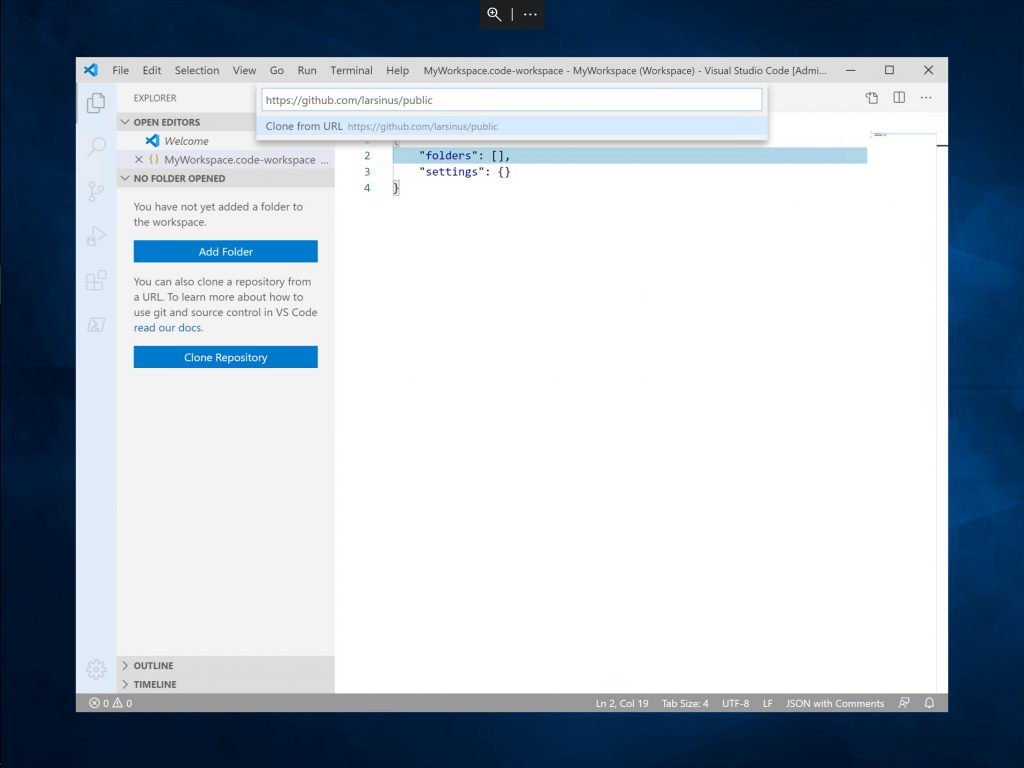
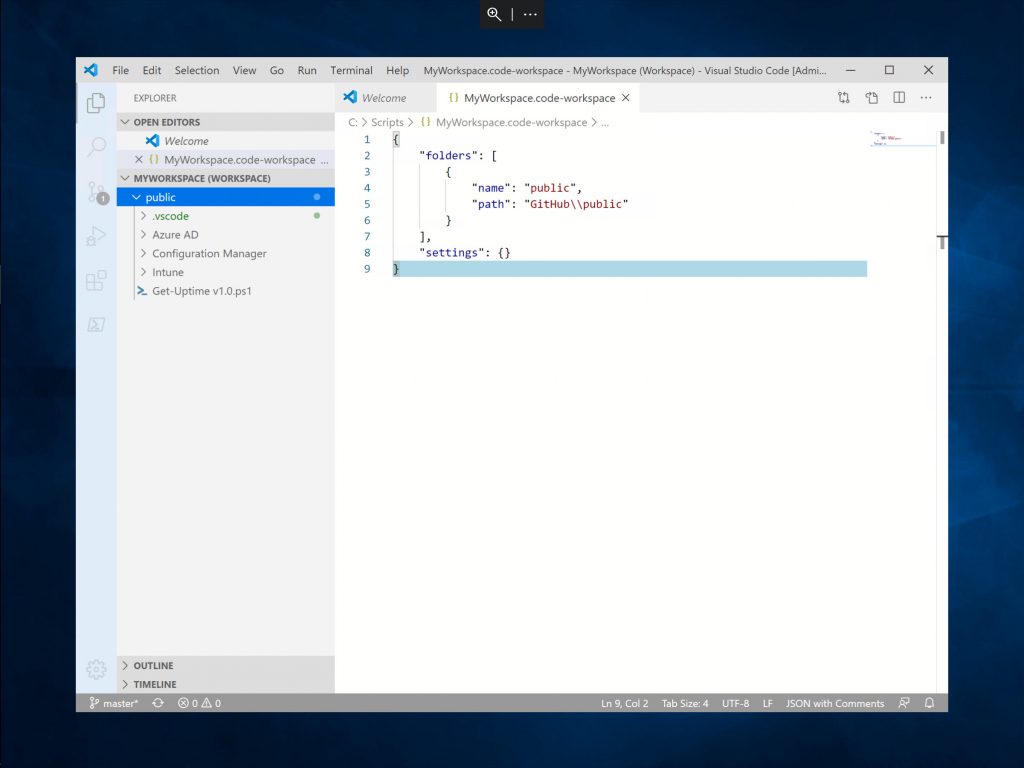
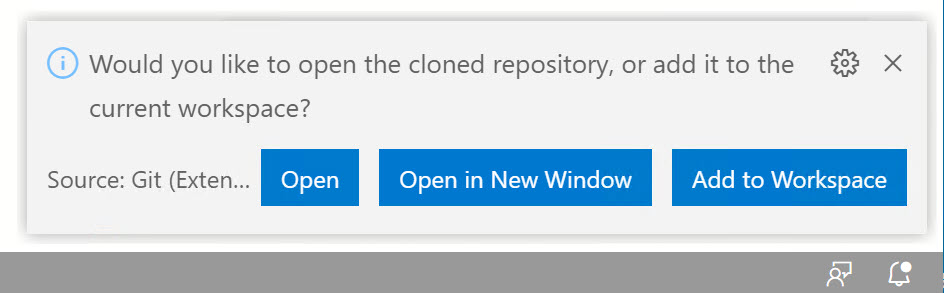
or simply hit [F1] and type ‘Clone’ and select ‘Git: Clone’. Paste in the URL to the repository. Select a folder where you want to synchronize the content to. Finish with selecting [Open]. You may be asked to save your Workspace. If so, do it and you’ll see the folders in the left column (same as in the second video).


Get to the point, already! Finally… 😉
The simplest way of doing it is to hit [F1] and type ‘enable ISE’ and select the ‘PowerShell: Enable ISE Mode’.
This may be good enough, but I wanted to do some changes. Bolder, larger fonts. Highlighting corresponding parentheses. Some color adjustments. If you want to do the same, read on. Otherwise, have fun scripting!
Copy/Paste the next section from my GitHub repository into the “settings’ section.
Hit [Ctrl]+[S] or go to ‘File’ and ‘Save’… voilà
There are a bunch of settings you can do. I just browsed a few sites and put this together. Let me know if you find anything cool/useful.
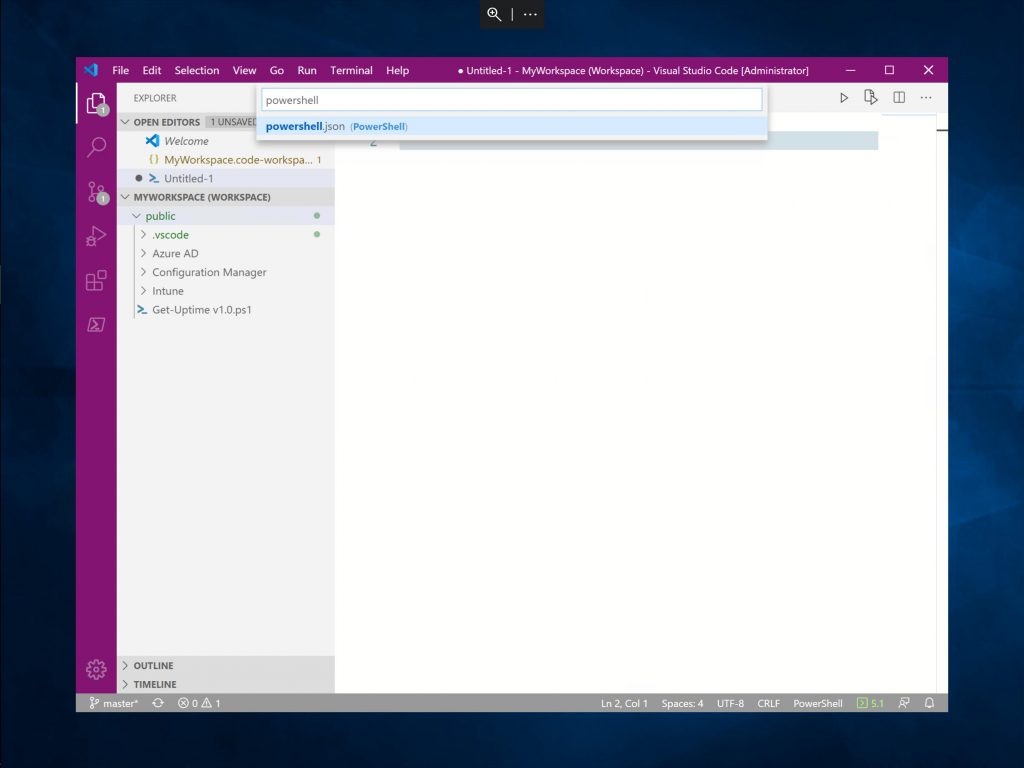
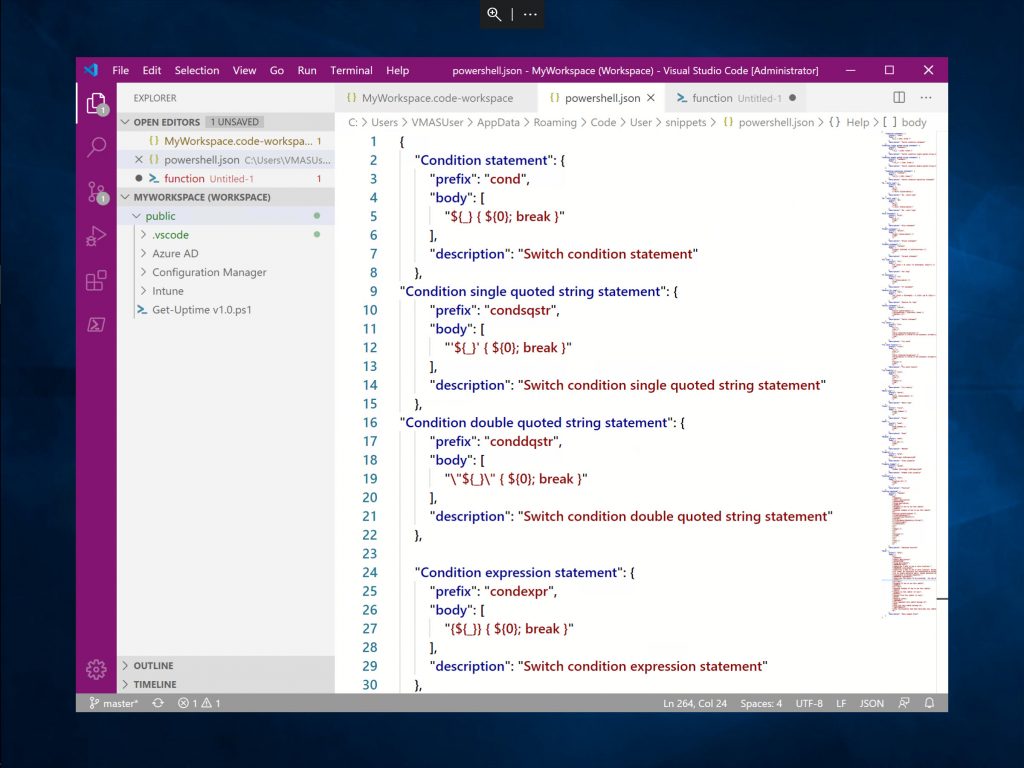
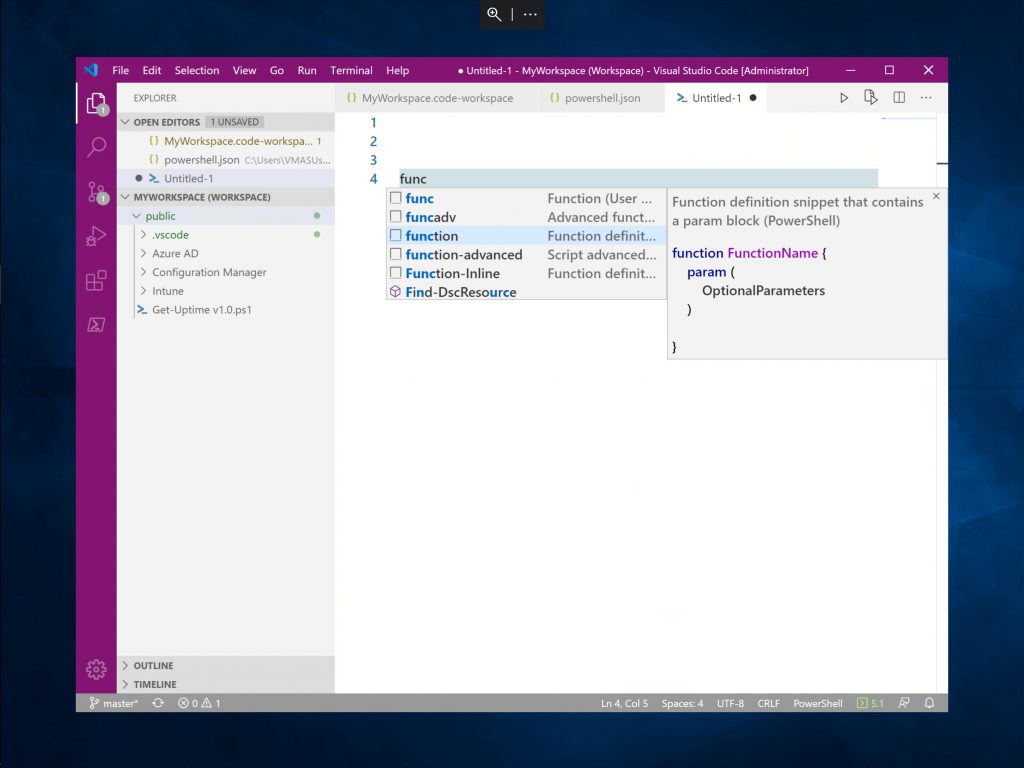
We now have the look of PowerShell ISE but not necessarily the IntelliSense. Let’s “fix” that. Not sure if everything is added, but Keith Hill have created a snippet for us to download. Thank you, Keith!

Now that you’re done. Go, code something 🙂 Not everything is as cool/useful/same as it’s in PowerShell ISE yet, but it’s a start.

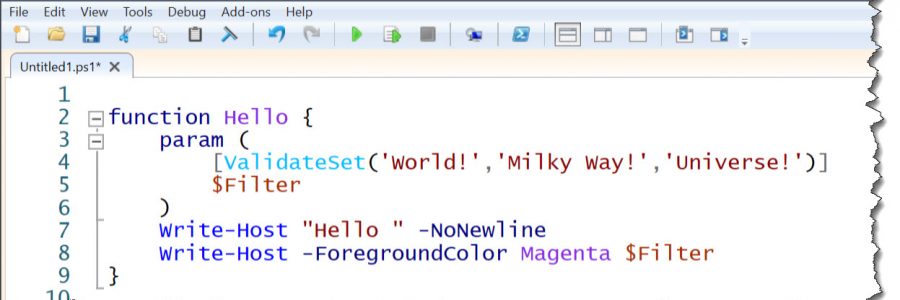
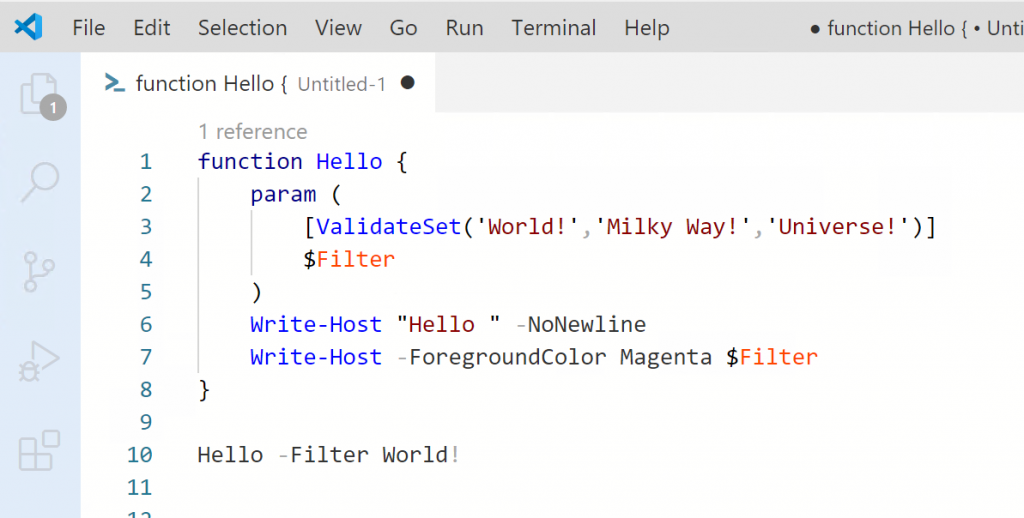
VS Code showing valid options for a parameter 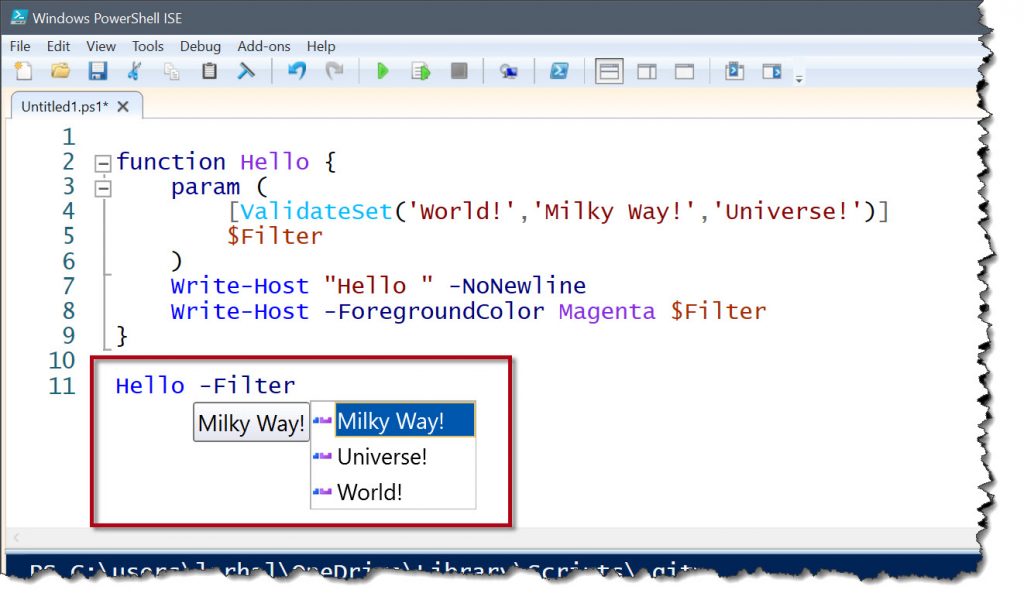
PS ISE showing valid options for a parameter
Note!
As you may have noticed there are multiple ways of achieving the same goal. There are probably several others as well… Anyway, hope you liked it and happy scripting!
Links
- Visual Studio Code | https://code.visualstudio.com/Download
- Workspace settings | https://github.com/larsinus/Public/blob/master/VS%20Code/Workspace%20Settings.json
- Keith Hill ISE snippet | https://gist.github.com/rkeithhill/60eaccf1676cf08dfb6f
- VSC Keyboard Shortcuts | https://code.visualstudio.com/shortcuts/keyboard-shortcuts-windows.pdf
- VSC Key Bindings | https://code.visualstudio.com/docs/getstarted/keybindings